masonry contractors

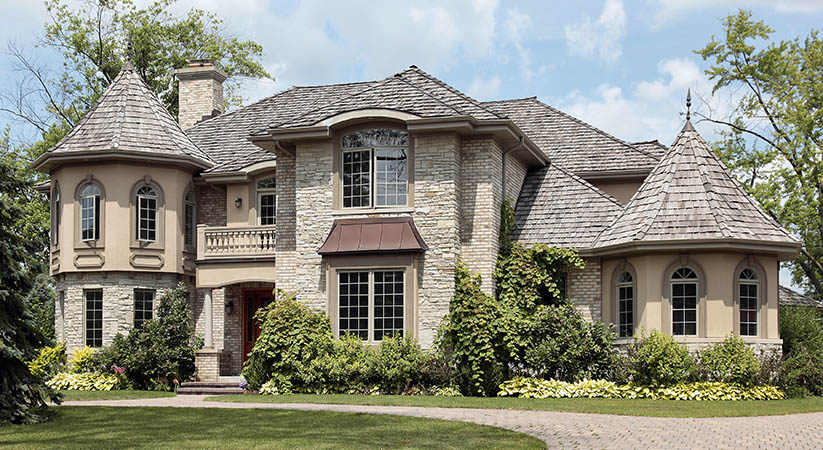
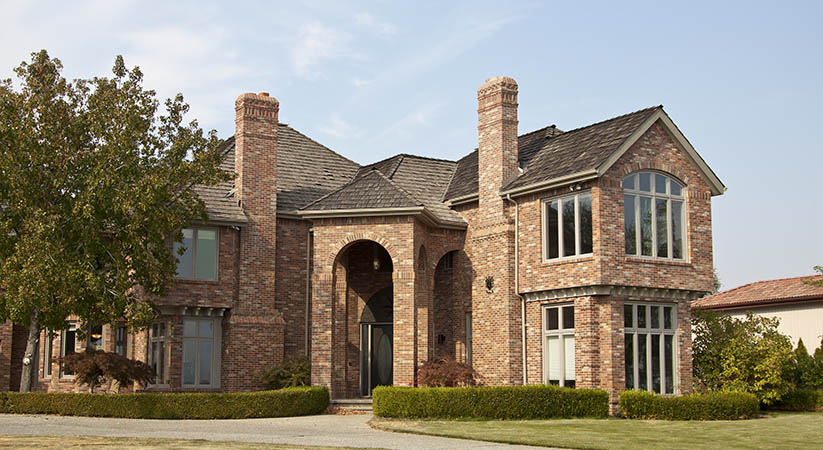
Stone Veneer Vs Brick Veneer – Which Exterior Wall Siding To Choose

Stone and brick veneers can allow you to enjoy the looks and feels of these materials without actually paying for the actual materials. Doing this can save you a lot of labor and expenses. You only have to hire a stone veneer contractor and buy the material.

These wall sidings don’t only provide your house with amazing looks, but it also provides an extra layer of insulation due to the air gap between the veneer and the outside of the walls of your house. This serves to increase the energy efficiency of your house as well.

In the past, workers will usually use mortar to lay down each brick and stone in place. While this looked very beautiful, this process was really expensive, time consuming, and also required a lifetime of upkeep and maintenance to stay in a good shape.

In building projects, these materials are responsible for supporting the whole building. That is why moving those materials from their fixed space can compromise the strength of your building. On the other hand, stone and brick veneers are applied after completing the construction project. Therefore, you can remove the veneers and the building will still stay intact.

Here are brief overviews of using both stone and brick veneers as siding on your house.

Benefits Of Stone Veneer

In the past, stone was used for construction because it was the only durable material available. However, it has become more of an aesthetic feature in building projects these days. So, you can use thin stone veneer outside your house as siding. This will work as a great decorative feature for both your house and your business facility.

Stone veneers are actually made by attaching together stones made with Portland cement, pumice and some other materials. All of this results in a natural looking wall siding that will definitely meet your aesthetic requirements.

Thin stone veneer can actually be used in round areas since it is flexible. This type of veneer is easy to install, and you don’t need any special skills to install it on the outside of your house as only a few woodworking tools are required for the task. Additionally, this type of veneer weighs a lot lesser as compared to real stones, so the shipping costs are pretty low, and working with these is also easy and safe.

Benefits Of Brick Veneer

While stone veneers are actually made from engineered stones, thin brick veneers are made from thin bricks cooked in a kiln by using the same materials as in traditional bricks. However, installing it is as easy as installing a stone veneer, and no expert knowledge and hard work is required in the process.

You can actually buy thin brick veneer sheets cut in specific sizes, and just stick them to the outside of your house. Buildings made with bricks as their structural unit require expert brick work in order to stay intact.

However, this might not be possible in areas where strict laws regarding earthquake and water safety are applicable. But there are no laws and codes for installing brick veneers, and you can install them after completing your code compliant building. This way, you’ll fulfill all the legal requirements, and will still be getting the looks that you always needed.

Thin brick veneers are available in a variety of different sizes and colors to choose from, and they can be fitted with any type of building structure.

Stone Vs Brick Veneer, Which One Is Better?

If you’re divided between stone and brick veneer for your next home renovation project, you should keep in mind that both of them look great. At the end, it all depends on your personal preferences. Both of them are high quality as well, and will last for a pretty long time if installed correctly and maintained well on the long run.

Conclusion

You can even get decent warranties on both of them, and they require less maintenance. For an affordable price, you can get a great looking exterior for decades to come. You can call a masonry contractor and book an appointment with them to get a free estimate. This way, you can choose the one which falls under your budget. lagrass

Read More »

Pros And Cons Of Building An Indoor Swimming Pool

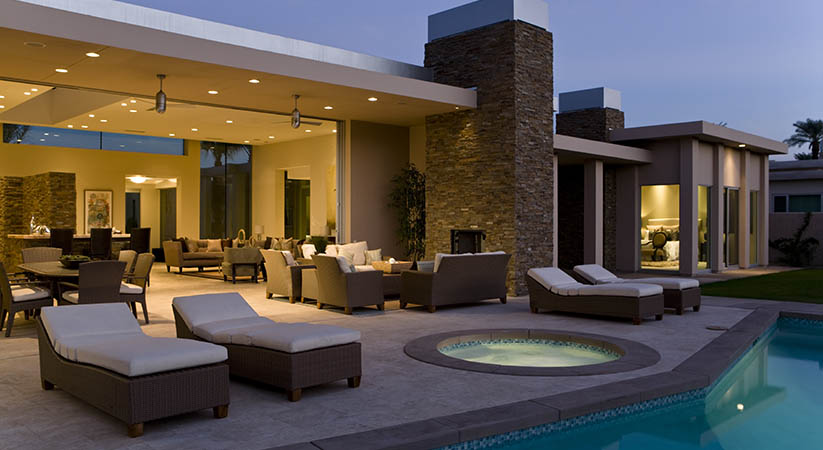
Having a swimming pool in your backyard can be a great luxury. But there is a problem, the outdoor swimming pools must be closed when the cold weather approaches. If you hate closing your pool after just a few months of warm weather, you can consult with a swimming pool builder for an indoor pool.

Here are some of the pros and cons of indoor swimming pools.

Pros of Indoor Swimming Pools

There are many pros/benefits of having an indoor swimming pool built inside your house. Some of them are mentioned below.

Year-Round Usage

If you’re living in an area where the warm weather season is very brief, then you can benefit the most by having a pool that you can use year-round (12 months). The investment might be a bit higher, but it will cover its cost by needing less maintenance, and by being open 12 months of the year.

Low Maintenance Need

As we already mentioned above, the indoor pool requires lesser maintenance as compared to the outdoor ones. There are almost no leaves and insects to deteriorate the quality of water, and so, the need of skimming decreases. Since almost no dirty air from outside touches the water inside, you can limit, if not eliminate the growth of algae. The swimmers won’t take grass and dirt into the water, and there will be no damage caused to the pool by sunscreen. This may also reduce any mortar cracks and the need for frequent repairs

No Sunburns

Having a pool built inside the house is actually pretty great. You won’t have to be conscious about getting sunburn, and there will be no need to have sunscreen on your body. So, you can enjoy indoors without caring about the sun.

Better Privacy

Some people do enjoy the outdoors, but that’s not everyone. Some people are less social when it comes to swimming in the pool, or taking a nap in the water. In this case, an indoor swimming pool is your best choice to keep all the unwanted eyes out. This increases your privacy standard.

Safety

An outdoor pool is in no ways safe from strangers. A sneaky trespasser can get into your pool and use it without you even knowing. So, the best way to keep your pool safe from strangers is getting it built indoors.

Cons of Indoor Swimming Pools

While they can be safer, well-maintained, private, and available year-round, the indoor swimming pools do have some cons.

Here are some disadvantages of building an indoor swimming pool.

High-Humidity Level

Because they have lots of water in them, pools lose lots of moisture into the air, even when properly covered. With an outdoor swimming pool, this isn’t a problem at all, but with the indoor ones, this can be a big issue. To keep the humidity level of your pool down, you’ll need to use specialized equipment.

Initial Cost

The initial cost of building an indoor pool can be considerably higher as compared to building an outdoor one. Additionally, you’ll need to have lots of vacant indoor space to get the pool built.

What Is the Cost of An Indoor Pool?

An indoor pool, along with all the needed equipment, and the structure surrounding it, can cost you up to $190,000. This cost includes several different parts that you’ll have to invest in to get a perfect indoor pool built for yourself and your family.

This might seem like a crazy amount of money for a pool, but consider the fact that you’ll be able to use the pool year-round, which is a great luxury to have.

ROI on an Indoor Pool

A swimming pool, whether indoor or outdoor, can add up to 5% to 10% of extra value to your house. This value is suggested by trusted real estate agents working in the industry for many years.

So, we can say that the ROI on a pool is considerably less as compared to what you’ll have to spend to get the pool built. So, if you’re planning to sell your house anytime near in the future, then investing in an indoor pool probably won’t be the right choice. You should consider every different aspect before investing in an indoor pool including the cost and work of the pool contractor you’ll hire. lagrass

Read More »

How To Repair Mortar Cracks In Stone Wall

With the exception of serious structural wall issues, call upon patio contractors to fix it on immediate notice. No need to worry much as open, wide and from end to end cracks can easily be filled if addressed on time.

Things to know about patio masonry work

  1. Gather Necessary Tools

Before beginning the repair of your mortar cracks in stone wall, you need to make some necessary preparations. Starting with gathering tools, you need to make a proper list which you think you will need to make a full repair. For instance, it is advised to keep chisel, brushes, hammers, Angle Grinder, trowel, small hand broom, whisk broom, safety gloves, dust mask, and all other such necessary tools.

This step may be skipped if you are getting these services done from a masonry contractor as they already carry all these tools with them.

  1. Evaluate the Damage

You know mortar itself has the ability to magically heal itself and fix tiny cracks in some cases. But you need to first assess the situation to get the idea of depth of damage like either the stone is badly broken with big chunks or there is an inch of mortar cracks on sides. You can easily plan for the restoration then according to the level of damage that has caused. The evaluation is done much properly if done by a professional patio contractor as they understand all these technicalities very quickly and easily of course.

  1. Cleaning

Spruce out the crack to remove visible particles using chisel or hammer whatever needed or available with you. This will allow you to make space for new mortar which would be easily accepted by stones in the wall as well. You can also use a small hand broom or a compressor blower to dust off tiny, loose particles or debris between the cracks.

  1. Preparation

Transfer a sack of mortar into a bowl or metal wheelbarrow and start adding water in it while continuously stirring the solution with trowel. Prepare the masonry mortar with accurate consistency, better to take advice from your patio contractors for the consistent thickness. You can assure the consistency by forming balls of the mixture and see if they hold their shape. It the shape is retained then you just need the solution to sit for an hour or two and then add the remaining water. When the mortar solution is pliable enough but still stiff then you are ready with the mixture to use.

  1. Filling Back

Do wetting of damaged joint prior applying the new mortar solution by using brush dipped in water. Make sure to tightly pack the joint while do not put a very thick layer or new mortar over old one. May be, taking advise from your masonry contractors is a good solution to assure the mortar solution is applied properly so as to not to face damage again in near future. Or try to keep a one forth thick layer of new mortar solution over the edges of existing mortar with the help of a tuck pointer tool. Then push the solution inside to avoid any possible air bubbles and then add the one forth layer thick layer of new mortar solution again to assure the cracks are all tightly packed.

  1. Drying and Finishing

Firstly, you need to allow the patch to dry for an hour or two after filling and then you need to sand the filled surface using medium grit sandpaper so as to assure uniform blending of patches between the stones. Then brush away the excessive mortar using a masonry join so that the surface looks as good as the new looks like.

  1. Post Care Needed

Once you are done, make sure to be careful with your walls to prevent such damage in future again. Check out your walls from time to time so you may get to know about any damage as early as possible.

Bonus – Cause We Care

  1. Always wear old or protective clothes, shoes and hand gloves to save yourself from any damage while working with motor.
  2. And don’t forget to stock up with these frequently used tools to keep yourself ready to FIX-IT-YOURSELF whenever needed.
  3. Trust and listen to the advises of your masonry contractors as they are professionals and know these technicalities better than us. lagrass
Read More »

How to hire Masonry Contractor

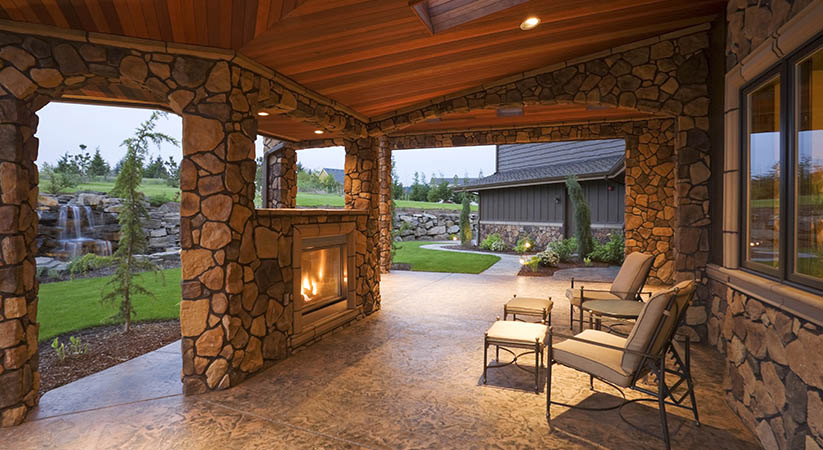
Masonry is one of the oldest professions of the planet. Today, masonry contractors can build a broad range of structures such as a chimney, patio, fireplace, brick walls, etc.  In the olden days; masons were only liable for creating versatile, lovely and sturdy structures.

Pick a professional for a successful home building project

Are you looking for someone who can support you beautify your house? Today, masonry contractors job with a big range of materials such as tiles, terra cotta, concrete blocks, clay, rocks, and bricks. But, remember that every person does not have the ample experience and skill for handling your house building project. If you don’t pick an experienced and skilled contractor, he/she can destroy your project and cause unnecessary monetary burden.

Discuss to the masonry contractor

Do not worry about asking questions to the masonry contractor. It is very important to take some time in doing complete research. If you ask the best questions, you will be capable of getting relevant detail from the contractor. It will support you in deciding whether he/she is the top expert for your house building project.

Have you licensed masonry contractor?

Machines are yet to change the expertise of mason. So, it is vital to know whether the contractor has best skill and certification to accept the liability of house building project. Don’t forget to check her/his proof of insurance.

How should I prepare for the house building project?

To make sure a successful house building project, you will have to support the contractor. Ask her/him about your liabilities. Generally, a stone veneer contractor expects you to get rid of furniture and other belongings from the project place.

If you want to purchase the materials yourself, you must tell him/her so that it does not make any doubt in future.

Do you have references from customers?

When it comes to hiring any contractor, you must discuss with previous customers. It will support you in knowing whether the contractor ends his job on time. Ask the previous customers about their level and experience of satisfaction with the job.

You can even request the masonry contractor to give you with the address of her/his present sites. You can visit a couple of websites and examine the job.

What is the payment schedule?

Financial matters should be talked before signing the contract. Ask the contractor for her/his payment schedule. If you need to pay initial amount upfront, make preparation for it. Also, don’t forget to set a date for paying the remaining amount. You should hire the best landscaping company long island.

Read More »