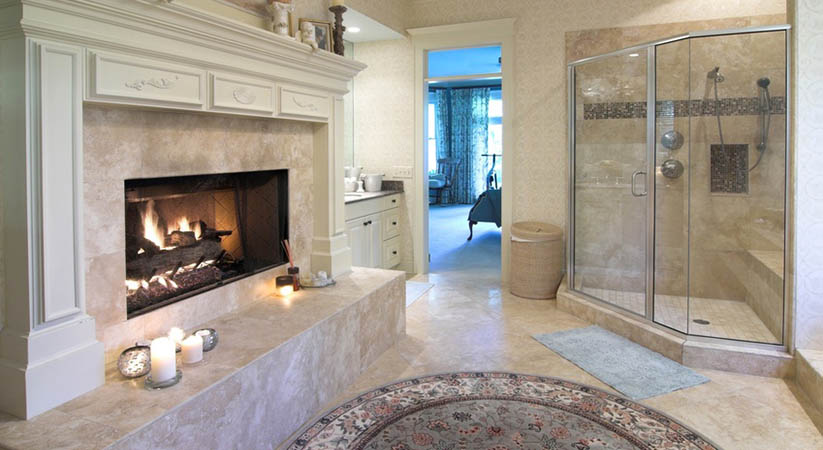
For homeowners looking to update their space or increase their property value, bathroom remodeling can be a rewarding and exciting project. It is possible to achieve your dream bathroom on a budget if you have some knowledge and are willing to be patient.
DIY Bathroom Remodeling: A Step-by-Step Guide
In this informative and engaging guide, we’ll take you through the step-by-step process of a DIY bathroom remodel, from planning and budgeting to installing fixtures and finishing touches.
Planning Your Bathroom Remodel
The first step in any successful DIY project is planning. Before you begin your bathroom remodel, take the time to consider your needs and desires for the space. What are your must-haves, and what features would you like to incorporate if your budget allows? Here are some aspects to consider during the planning phase:
- Layout: Determine the best layout for your bathroom based on your needs and the available space. Create a rough sketch to visualize the final outcome.
- Fixtures: Choose the type of fixtures you want, such as the bathtub, shower, toilet, and sink. Consider energy-efficient and water-saving options.
- Storage: Plan for adequate storage solutions like cabinets, shelves, and hooks to keep your bathroom organized and clutter-free.
- Lighting: Identify the ideal lighting solutions for your bathroom, considering both task and ambient lighting options.
- Ventilation: Assess your current ventilation system and decide if any improvements are necessary to prevent mold and mildew growth.
Creating a Budget and Gathering Materials
Once you have a specific vision for how you want your bathroom to appear, it’s necessary to establish a budget. This will help you make informed decisions when choosing materials and fixtures. To create a budget, consider the following:
- Labor costs: If you plan to do the work yourself, factor in the time and effort required for each task. If you need to hire bathroom remodeling professionals for any part of the project, research local rates.
- Materials: Research prices for the fixtures, tiles, paint, and other materials you will need for your remodel.
- Contingency fund: It is advisable to allocate a part of your budget for unforeseen expenses like plumbing or electrical issues that might come up during the project. This portion of the budget is known as a contingency fund.
With your budget in place, begin gathering the materials needed for your remodel. This may include tiles, paint, fixtures, and tools. Don’t forget to shop around for the best prices and consider upcycling or repurposing materials to save money.
Preparing the Space
To start remodeling your bathroom, it’s important to prepare it first before installing any new fixtures and finishes. This may involve removing old fixtures, tiles, and cabinetry. Take the following steps to prepare your space:
- Cut water supply: To avoid leaks and flooding while renovating, find the shut-off valves for your bathroom’s water supply and turn them off.
- Remove fixtures: Carefully remove any fixtures you plan to replace, such as the toilet, sink, and bathtub. Be sure to disconnect any plumbing connections before removing fixtures.
- Clear the space: Remove any cabinetry, shelving, and other items from the bathroom to create a blank canvas for your remodel.
Address any issues: Inspect the space for any signs of water damage, mold, or mildew. Address these issues before proceeding with the remodel to ensure a healthy and safe bathroom environment.
Installing New Fixtures and Finishes
Now that your space is prepared, it’s time to start installing your new fixtures and finishes. This stage of the remodel may include tiling, painting, and installing new fixtures. Follow these steps to ensure a successful installation:
- Install the bathtub and shower: If you’re installing a new bathtub or shower, follow the manufacturer’s instructions for proper installation. Ensure plumbing connections are secure and watertight before moving on to the next step.
- Lay the tiles: If you’re tiling your bathroom floor or walls, start by applying a layer of thin-set mortar to the surface. Lay the tiles according to your chosen pattern, using spacers to maintain even grout lines. Once the tiles are in place, allow the mortar to cure before applying grout.
- Install the toilet and sink: Follow the manufacturer’s instructions for installing your new toilet and sink. Double-check the plumbing connections to ensure they are secure and leak-free.
- Paint the walls: If you’re painting your bathroom walls, begin by applying a primer specifically designed for damp environments. After the primer has dried, use a high-quality paintbrush or roller to apply your selected paint color. Make sure the paint dries thoroughly before moving forward.
Adding Storage and Lighting Solutions
With the fixtures and finishes in place, it’s time to focus on the storage and lighting solutions for your bathroom. These elements are crucial for creating a functional and inviting space. Consider the following steps:
- Install cabinetry: If you’ve chosen to include cabinets or vanities in your bathroom design, carefully install them according to the manufacturer’s instructions. Ensure they are level and securely attached to the wall.
- Add shelving and hooks: Incorporate additional storage solutions, such as shelves and hooks, to keep your bathroom organized and clutter-free. Choose materials that complement your overall design and can withstand a damp environment.
- Install lighting fixtures: Follow the manufacturer’s instructions to install your chosen lighting fixtures. Ensure that any electrical connections are secure and comply with local building codes. To make the space well-lit and inviting, you could use both task and ambient lighting.
Finishing Touches
The final step in your DIY bathroom remodel is adding the finishing touches. These details will bring your design to life and create a cohesive, polished look. Consider the following finishing touches:
- Apply caulk: Apply a bead of caulk around the edges of your bathtub, shower, sink, and any other areas where water may seep in. This will create a watertight seal and prevent water damage.
- Install hardware: Attach any hardware, such as towel bars, toilet paper holders, and cabinet knobs or handles, to complete the look of your bathroom.
- Decorate: Add decorative elements, such as artwork, rugs, and shower curtains, to personalize your space and make it feel welcoming.
- Clean up: Give your bathroom a thorough cleaning to remove any dust, dirt, or debris left behind during the remodeling process.
Conclusion
Remodeling your bathroom on your own may seem overwhelming, but by planning carefully, setting a realistic budget, and following a step-by-step approach, you can design a beautiful and practical space that serves your requirements and showcases your unique style. This guide is informative and engaging, and if you follow it, you can remodel your bathroom beautifully. This will add value to your home and improve your daily life.
Embarking on a DIY bath remodel project is not only a rewarding endeavor that allows you to express your creativity, but it also provides an opportunity to learn new skills and boost your confidence as a homeowner.